Tuesday, October 6, 2015

Calcutta Instameet 4.0 and a tough decision

We all must have come across such situations in life where we have to take a tough decision. Such a situation is never easy. Its very taxing on your very soul. I faced one such instance this Sunday. But before I write down about that, time for a little back-story.

Even though I love to shoot, due to my hectic work schedule, I was not getting enough chances to go out and shoot. It happened many a time that I was determined to go out on a photo walk with friends but was forced not to go due to some other work. So, when I heard that an Instameet is taking place in Kolkata, I was determined to not to let go of this opportunity. But in this process, came the tough decision.

You see, for someone with a punishing week schedule, weekend unwinding is sort of a must. Accordingly, I went to a friends place (Which, incidentally is quite a bit far from the designated meeting point) on Saturday night and after some heavy.. err.. relaxation session, I was sleeping like a log. So you can well imagine when I woke up at around 7.30 on Sunday, how I was feeling. I was faced with two choices, go to the Instameet or sleep for some more hours. And since you are reading this post, you can well understand which decision I took.

Now don't laugh. That was a serious challenge for me to wake up and join the team at the designated time. Thankfully, Indrajit Das (who introduces himself as BongBlogger) gave me lift and that day I learned a new life-skill, dozing off while sitting at the back of a speeding motor-bike. Thanks Inrdajit for that. After reaching the point, I was relieved to see many familiar faces. Subhadip , Tanayesh, Prabir da etc. I suggest, you should read Subhadip's blog post about the Instameet. He has done a great job of covering the whole meet in a concise way. So, I am not going to write in detail about that. Just sharing some of the images I took that day.


Friday, September 11, 2015

How to choose a tripod

Hola amigos, como estas? Now that I have shown off my Spanish skills (thanks to Google Translate), lets get down to business. In this post, I am going to discuss about tripods. Now, when you are just starting out, discussing about a tripod may seem a little odd. In most cases, when you are buying a DSLR, the shop keeper will be more than happy to include a free tripod in the deal to sweeten it a bit.The shop keeper will be happy that he didn't have to reduce the price of the camera and you will also be happy that you have received a tripod for free. It's a win-win situation for both right? WRONG. Before diving into the details, let me inform you at first that those tripods are good for nothing and using them may do more harm than good. At best those el cheapo tripods can be used as flash stands but never ever mount your camera on them. Why you may ask. Read on to find out.

So basically a tripod is for mounting your camera on top of it. The most basic and absolute necessary function of a tripod is holding the camera steady when the shutter is pressed. The aforementioned cheap tripods fail in this very basic function. In most of those tripods, you can visibly see the shake in the tripod when the shutter is pressed. So there goes your photo straight to the trash due to camera shake. Not only that, using those tripods can potentially destroy your camera. Normally those are made of aluminium and are very lightweight and wobbly. If you are not holding them, they can easily topple over and destroy your whole equipment. So, in nutshell, never ever buy cheap tripods, not even one is being given to you free of cost by the seller. Take something else, like a memory card as that will be more useful than these good for nothing trash.

Now since that is out of our way, lets discuss things in detail. You may be surprised to know that how many different kinds of tripods are there in the market. There are the normal tripods that usually come with a Pano head, then there are more professional offerings where the legs and the heads are sold separately, there are carbon fiber tripods which are extremely sturdy and lightweight, there are video tripods which are specifically designed for video cameras and so on. Instead of trying to discuss them all at one go, lets break up the discussion in various parts of the tripod. 

Friday, September 4, 2015

First Impression- Tamron 90mm f2.8 AF Di Sp Macro

Whats up guys? I am a bit excited about this post as this is going to be my first product review post. Recently I was diagnosed with GAS (Gear Acquisition Syndrome) and as a result, had to get something to quench my craving. So I got myself a new Macro lens and since I am not at all good in taking macro photographs, I thought of taking some photos of the lens itself and make a new post. But before I begin, I should make this clear that, this is not a detailed, in-depth review of the lens with lots of stats, MTF charts and whatnot. You will find many such reviews online. I am just sharing my first impression as an amateur.


I got myself this lens only a couple of days back. I must thank Mr Prabir Bhattacharyya, a senior photographer, for accompanying me and giving me the final 'push' for buying this piece of glass. (He is a veteran bird photographer. You can take a look at his flickr link here) Though I am not skilled enough yet to take proper macro shots, I still got this lens for using it as a standard portrait/close up lens for taking photos of flower, food etc. (Plus at around 20k, I didn't have much to lose anyway :P ).


Thursday, September 3, 2015

How to take sharp pictures

Hello friends. Its been a long while since my last post. In the meantime, I was bed-ridden with Typhoid and those who are unfortunate enough to suffer this horrible disease know fully well how weak it leaves you. It has been almost a month and yet I feel that I am not fully fit. But the show must go on and hence this post. Honestly speaking,  I was kind of getting lost thinking about the subject of my next blog. Then one think stuck my mind, why not write about something which affects the quality of the image a great deal. You must have noticed one aspect in almost every pro level photo. They are sharp. Super sharp to be precise. Open up any fashion magazine and you will be amazed with the amount of sharpness and detail in the images there. Thats one of the key elements that differentiate between images taken by us amateurs and the professionals. Now of course they do not shoot with the likes of Nikon D3300  or Canon 750D with the 18-55 kit lenses, but still, if we keep some important things in mind, we too can take sharp images from the modest gears we own (ok,  not as sharp as the Pros, but lot better than what we generally get).

Monday, July 27, 2015

Tips on Nature/Landscape Photography

Landscape photography is a fascinating world in itself. Those who are unaware of it may think that this genre of photography is very easy as all one needs to do go to a beautiful location and shoot. Wrong. In fact, in many cases, you can take liberty with your composition in street or some other kind of photography, but when it comes to landscape photography, you have to be careful about every element in your frame and their composition. Otherwise your images will turn out to be the same Ok-Ok kind of landscapes that we come across everyday on various social networks.

For a landscape to look stunning, a number of elements must be present in the picture and more importantly, they must be in sync. Generally when one goes to a stunning place, people tend to stop thinking and just point the camera and press the shutter. The result becomes evident when we often hear lines like "The photos are nothing, you have to be there to understand the beauty" or "The place was really stunning, the camera couldn't capture it". A photo doesn't become beautiful just by itself. You have to work to make it beautiful. I am a complete novice, but still, during the last few months, I have done a bit of homework and in the process, learnt a few tricks about landscape photography. Just sharing them with you all now as I have always done. Feel free to add some points or to ask any questions in the comments. I will try my best to reply. So now lets get started.

Wednesday, July 22, 2015

Decoding Photographic Jargon


We all have faced this scenario some time or the other in our life- We are sitting in a group with some other people, who happen to share a common interest. And while they are talking among themselves regarding their interest, they are using some strange words, which do not make any sense at all to us and we just sit there, awkwardly smiling like an idiot, trying to figure things out. That, my friend, is Jargon.The dictionary definition of Jargon is- "special words or expressions used by a profession or group that are difficult for others to understand". Photography, being a unique blend of art and science, has its own fair share of jargon as well. Whats more troublesome is, almost all the photography websites use them extensively while discussing things. So, unless you are well aware of them, it becomes very difficult to even comprehend what is being spoken about. So, this is my own feeble attempt at decoding some of the most commonly used photography jargon. It is impossible to cover all of them in a post, so I am concentrating on the widely used ones. If you want to add or contribute some others, feel free to do so in the comments.

Tuesday, July 21, 2015

How to read a Histogram

Man I hated Histograms. Back when I was in school, they seemed stupid and pretty useless and I loathed making them in a class. Now fast forward almost 15 years and now I am a changed person. I love Histograms and use them extensively while shooting photographs. Surprised? Well read on..

If by any chance, you have missed your school (or slept through the periods) and do not know what a histogram is, here is your chance to learn it again. A histogram is a display of statistical information that uses rectangles to show the frequency of data items in successive numerical intervals of equal size. In the most common form of histogram, the independent variable is plotted along the horizontal axis and the dependent variable is plotted along the vertical axis. 

Still not clear? Well a histogram in a digital camera is exactly the same thing as explained above. It shows the distribution of tonal range of a particular digital image. Histogram is one of the most important advantages of a modern digital camera as we can manage our exposure very easily by reading the histogram. Actually, in modern image processing softwares, there are separate histograms available for each individual colour channels (Red, Green and Blue), but we shall not be looking in to that aspect in this post and will be looking only at the unified histogram. So without further ado, lets get into decoding Histogram.

Monday, July 13, 2015

Five YouTube Channel that a Photographer must subscribe

If you are just like me who doesn't have any time (or money :'( ) to attend any Photography Course, fret not, IIN is there!!!! Jokes aside, today Internet is such a medium that one can learn anything and everything, if the desire is there and Photography is no exception. In fact, there are so many high quality materials and tutorial videos freely available for teaching Photography, one hardly has to spend any money (apart from the internet bills that is) to learn the art.

There are many quality websites that give some very good tips and tutorials but in this post, I shall concentrate only on the YouTube channels. There are many good channels available that offer quality content and advise on Photography. In fact there are some illustrated photographers who have managed to build their entire career out of the publicity they have received by making YouTube videos. Their channels have millions of viewers (literally) and upload videos almost everyday. Not all the videos may be useful to us, but it doesn't hurt to watch and in the process, we may get something in return as well. So lets go and take a look at the following channels-

Sunday, July 12, 2015

How to get better in Photography

I vividly remember when I first got my "serious" camera, a DSLR. I always had a knack for image-making and even when all I had was a Kodak P&S, I used to shoot many pictures. Thats how I realized that I am being limited by my camera. So, when I ultimately made the jump to a DSLR, it didn't take long for me to understand how it works and within a day or two, I was shooting away like crazy, subject or composition be damned. Naturally as all of you may have experienced, getting honest feedback is a tough job. If you show your photos to your immediate friends and relatives, they all will praise them just to make you feel better. And if you post your pictures in dedicated photography forums or Facebook pages, very very few will take the pain of telling where are you going wrong, because you are new there and the experienced photogs don't want to hurt you by giving negative feedback. So, long story short, after a month or two, I almost shot close to a thousand photo, but all of them were crap, literally.

This is not only my story, but I reckon, anyone starting out in the field of photography is bound to have the same experience. We shoot anything and everything but don't realize where we are going wrong or why our photos suck while some of our experienced friends can take the same picture and their ones look much better. In this post, I am trying to decode this mystery of how to get better in photography. This may be a long(ish) post, so please bear with me. Lets get started-

Saturday, July 4, 2015

An escape route from Kolkata..and a unique view of Victoria Memorial

Those who are from West Bengal, or particularly from Kolkata, the place Canning holds only one meaning. Thats the place where all the domestic helps come from!!! I never went there before, and due to this reputation, the image that came to my mind about Canning was not so flattering. So naturally when my friends Anupam suggested we go there for a photo shoot, I was a bit apprehensive. But since Anupam was so persuasive, I couldn't say no and decided to go. Boy, was I lucky to accept his offer. Because not only the place is extremely picturesque, the journey to and from Canning was a great fun.

Canning is situated at extreme south of West Bengal, and the river Matla flows through it. During the rainy seasons, one can get gorgeous cloud formations and outstanding colors during the golden hours. We mainly concentrated on shooting landscapes by the river bank. As expected, due to the continuous rainfall, the river bank was extremely muddy and slippery, making the task of shooting more difficult. After we packed up that day, we were covered in mud upto our knees, but when I look at the images I got that day, I have no repentance. Time permitting, I am raring to go there once again and shoot some more images. I am sharing some of the images I took that day. Please share your feedback and comments on the images.

When the day ends

Sunday, June 28, 2015

RAW vs Jpeg


Enough of the general stuff, lets talk about something controversial today. RAW vs JPEG. Even if someone has just started out photography, he simply can't miss this. In fact, if there is something more polarizing in the photography world then Canon vs Nikon, it has got to be RAW vs Jpeg. Both have their own set of advantages and disadvantages and users of both camps swear by the advantages of their choice. But that doesn't mean that a starter should blindly follow a particular format without know about both first. After you come to know about them and know about all the features, advantages and disadvantages, you may decide which one you want to use. So, without further foreplay, lets jump directly into the topic in hand.


Image Credit-  Kurosawa Michiyo

Sunday, June 7, 2015

Understanding Composition in Photography (Part-2)

After my last post, I had to think a lot on how to advance on this particular topic. Composition is such an important aspect of photography and there is so much to discuss that its very easy to get digressed from the main topic. In fact, without the ability to compose the shots well, one can never take take good images no matter how good or advanced the equipment may be. A crappy image will look crappy no matter what is the gear used to shot that. 

There are some set rules or guidelines when it comes to composition, but as I have already mentioned in my previous post that photography is a form of art and there can't be any definitive rules. So, it is a very common scenario that the frame you composed very carefully keeping in mind a particular "rule" is violating two other "rules". So my advice would be not to get too bogged down by all the rules. Keep them at the back of your mind and compose your shots as per your heart. I can only speak what works for me and this is how I compose.


Thursday, June 4, 2015

Understanding Composition in Photography (Part-1)

When I started out photography around four years back, I didn't really think much about it. I bought a DSLR (Nikon D3100) and started out quite enthusiastically. Fortunately I was in Kolkata at that time and I found many friends just like me. I joined some Photography groups and began to go out in groups to take photos. I remember vividly those fun days. We would go out in hoards in and around Kolkata and click photos. In the end, we would come back, process them and post them in our common group for comments and critique. The first few outings were real fun as I didn't know a thing about photography and randomly shot and posted snapshots. The others, being the good friends they are, never said anything to me. I was blissfully ignorant that my images are literally crap.

One day, one of such friends asked me to show him my work and I gleefully showed him my flickr collection. I expected the usual "Good work, nice work" type of comments but what he said really surprised me. His exact words were- "These are nothing but ordinary snapshots. There are no thought or design to them. You need to improve a lot". He forced me to think and take a re-look at my own images. The same images which looked nice and interesting appeared downright horrible. That was the day, I came to know about something called Composition in photography and its importance.

Photography is a form of art, and there are no rules in art. But at the same time, there are some unwritten guidelines that good images allover the world across time follow. Of course there are exceptions and there are great pieces of art that do not conform to the so called guideline, but before breaking the guideline, we should learn about them first. Also, each and every of these "rules" do not apply universally to all the images. It is up to the photographer how he wants his photos to look like. What I personally do , is I keep the rules in my mind and when I see a scenario where a particular rule may apply, I try to compose accordingly. The rules and tips that I am going to discuss here is by no way exhaustive. These are some of the most basic rules that we photographers should know and apply to our images. As discussing all of them in a single post will be too cumbersome and lengthy, I am dividing this post in multiple parts. In this part, I am just laying down the very basic ideas about composition, and in later parts, I shall post some commonly used tools and techniques which even beginners can apply while shooting and improve their photographs. So lets go ahead and jump in it-

Wednesday, June 3, 2015

Inside a camera bag

Hello friends. In my previous posts, I blabbered a lot about camera settings,and even a camera buying guide (sort of). So today, I am going to discuss in detail about various gears you need for shooting. Now, one important thing. Whenever you hear the word gears, the question of cost comes first, and quite rightfully. Camera equipment cost a lot of money, and being an amateur, its really tough for some to shell out loads of money for something which doesn't give back anything in strict monetary terms (although, if you are only shooting for money, then you are a pro). So in this post, I am going to discuss camera equipment for amateurs that doesn't burn a hole in your pocket.

Camera-


I don't think, I need to discuss regarding this. If you are truly serious about your photography, get a DSLR or a mirrorless ILCE. There is nothing like it. It may seem intimidating, but once you get the kick out of it, you won't want to go back to a Point & Shoot camera. My advice is get a crop sensor basic DSLR. This will be enough for learning things and also to take good photos. And later, you can always upgrade if you want to. Some good basic DSLRs include the D3200, D5300 , D3300 from Nikon and EOS 1200D, EOS 700D, EOS 750D from Canon. (You can read my earlier post regarding which camera to buy here.).

Sunday, May 31, 2015

Understanding white balance

Hello friends. In my earlier post I discussed about shutter speed, aperture and ISO. Hope you have experimented with the manual setting a lot and have taken a lot of test pictures. Basically those are the most important three things you need to understand to take a good photo. But there is another setting which is also very important to take beautiful pictures. And that is known as 'White Balance'. Unfortunately, most of us amateur photographers tend to ignore this important thing, set it on automatic and start shooting. In this post I am going to explain what is white balance, why it is important, how to choose white balance correctly. So without wasting further time, let us start-

What is white balance-

In layman's language, we can say that white balance is the in-built color correction  feature of our camera. In other words, white balance is nothing more than an adjustment to get the color you want. Still confused?
This example will clear the confusion:- Suppose you are in a room with white walls and there are some bulbs in it. One tungsten bulb, one CFL, and a tube light inside a somewhat grey casing. Now, if you take turns at lighting one bulb at a time,and taking pictures of the walls, you will notice that the white walls do not appear white anymore. The tungsten light makes the walls look like some shade of orange, while the CFL makes the walls look bluish. White balance comes into picture at this moment. It warms or cools the color temperature and renders the wall white in the final image. (Warming color temperature means adding a reddish hue to the picture while cooling color temperature means bluish hue). Consider this example-


Monday, May 25, 2015

Different shooting modes of a camera

In this post, lets discuss about the different shooting modes that are available in most modern cameras. So without further ado, lets jump on it.

Shooting Modes-


So what is a shooting mode? We just take pictures of things, what mode has to do with it? Natural questions that come to mind. So make things clear, at the outset, let me be clear that if you are absolutely in ease adjusting the three pillars i.e Aperture, Shutter Speed and ISO while taking pictures in Manual mode, you may not care about the other modes. Full manual mode is always the best option. But unfortunately, we as amateur photographers are still not that much comfortable in using the full manual mode all the time. Then the shooting modes come handy. They are basically some preset settings that are most likely to fit some defined situations. Take a look at the mode dial of your camera. It should look something like this-
   

Sunday, May 24, 2015

Street Diary from the City of Joy- Part 1

Kolkata (or Calcutta, if you are still suffering from the Colonial Hangover) is popularly known as the city of joy. Now that name definitely baffles many, and maybe rightfully so. When an average person visits from abroad or even places like Bangalore or New Delhi, the first things that he notices are dilapidated buildings, pathetic public amenities, lax public administration, potholed roads, overflowing drains etc etc etc. Add to that the perceived laziness and "chalta hai" attitude of the city dwellers, now can we really blame outsiders?

I am not just making things up. This was exactly my story four years back, when I shifted to Kolkata from Bangalore. The familiar sense of despair and frustration quickly engulfed me in. Add to that the daily grind of travelling in over crowded metro/bus to and from the office, and you have enough ingredient to make even the most cool person lose his sanity. 

How to use the Light Meter and Exposure Compensation function

In my last post, I discussed how beginners like me learn to use the manual mode in our camera. However, I realized that, in order to understand the concept fully, we must learn how to use the in-built light meter of our camera. In this post, lets shed a bit more light on questions like, What is Exposure Value, how to read EV meter and what is exposure compensation. These things are critical to a photo and if your exposure is not right, then even a potential award winning photo will look blah.

Exposure Value

    If you want a geeky answer to what is exposure and want to learn complex formula consisting of various Latin alphabets, head over to Wikipedia. But if you are like me and want a simple idea, just keep in mind that exposure simply means the amount of light allowed to fall on the sensor during taking a photo. So a properly exposed photo means one where everything is well illuminated without burning or darkening something. Over and under exposed photo means excess light and inadequate light respectively.

    So now you know that Exposure is about the amount of light allowed onto the sensor which determines the brightness of a photo. Now, the next question, "How do I know what is the correct exposure for a photo?" This is where the EV meter comes into play.

    Saturday, May 23, 2015

    Shooting in Manual Mode

    Hello friends. Before starting this post, let me assume that you could muster the courage of reading through my long and rather boring post about buying a new camera (I know its too much to assume, but whats wrong in hoping ;) ). So, inspired by my post (and almost 100s of similar articles & blogs), lets assume (here we go again!!!) you have bought a new ILC. May be a DSLR, going by the market sentiment.

    So congratulations on getting the new DSLR camera. Open the box carefully, take out the camera with that smug smile on your face, fondle it like a new born baby and carefully take out the other accessories that came with it. Insert the Memory Card and the batteries. Now switch it on to see it coming to life for the first time. Now take the first shot with this baby. But wait!!! There are so many dials and buttons here!! Which one am I supposed to press? How to activate the flash? How do I auto-focus? Then the instruction manual comes handy. I understand which button does what. I also learn the functions of the command wheel, learn how to zoom by twisting the zoom ring on the lens, perhaps even take a shot or two using the Auto mode on your camera. And everything ends there itself. Oh its so confusing!! Why did I buy it in the first place? My old P&S camera was so simple!!!


    Friday, May 22, 2015

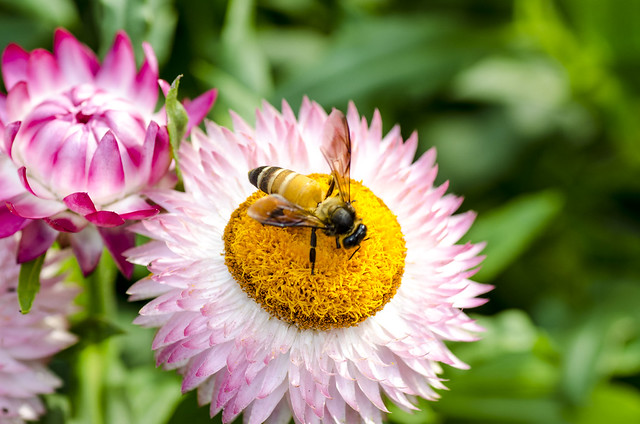
    Some random shots from AHSI Annual Flower Show at Alipore, Kolkata

    Every year, The Agri Horticultral Society of India (AHSI) organizes an annual flower show at its premises located at 1 Alipore Road, Kolkata. What makes this show special is the fact that it is the World’s oldest Flower Show in existence. Since the early part of 1828, ever year (barring 1940), this competition has been taking place as a prominent fixture of Kolkata’s happening. This is a gala event where around 2000 entries and 16,500 exhibits including edible vegetable are on display. First Annual Exhibition of vegetables was held on 9th January, 1828 in the rooms of the Asiatic Society under the auspices of the then President of the Society Mr. W. Leycester. 

    This year (2015), this event took place on 5th-8th February. I was aware of the show, but being the lazy bum as I am, I would have almost surely skipped this but for one Mr Subhadip Mukherjee. He is a very good friend of mine who happens to share a lot of common interests with me, photography and travelling being two of them. He is also an avid blogger and you can read his blog here- https://subhadipindia.wordpress.com/He literally dragged me to the location, and after reaching there, boy, I was glad he did. My situation was almost like a child in a candy shop. There were loads of different types of flowers and even vegetables on display there. I thanked my stars that I carried my trusty Tamron 90mm Macro with me. There were simply too many photo opportunities before me, and in the end I really thanked him with my heart. I am sharing some of the images I took that day.

    DSC_5465

    Busy Bee

    Wednesday, May 20, 2015

    Buying a new camera

    Since this is a photography blog, so I thought my second post should be something that's a very integral part of photography. After thinking about writing stuff related to exposure, composition and what not, I decided to go a bit closer to the beginning. What's the one thing, without which we can't start photographing? The camera, of course. Now there are thousands of camera models out there, so which one to buy? Before searching for an answer here, I would like to clarify one thing first. Regardless of which camera we buy, the ultimate end result will not depend upon the camera itself. Its a tool, through which we capture our interpretation of the world. So, while its natural to think about buying the latest and greatest camera when we are starting out, its important to keep in mind that just like an expensive pen automatically doesn't transform us into a great writer, a good camera automatically doesn't make us a great photographer. There is a lot of hard work, dedication and determination is needed to make us photographers.

    The first post

    Hello friends. This is the first post in this new blog. So let me take this occasion to welcome you all to my new blog. To tell you the truth, this is not my first attempt at blogging. In fact, this is the third (hoping to get third time lucky). It is said that we learn from our past mistakes. In my case, I will try hard to do exactly the same.

    My first attempt at blogging was an absolute disaster. It was way back in 2009 and I didn't know anything about blogging and I started a blog only because one of my friends was doing the same and it was more of a challenge for me to outdo him. As you can guess, that didn't go very well. It simply had no vision and after some 10-15 random posts (which were poorly written, ill-conceived and in case of one, downright disgusting) and some not-so-kind comments, it died its death. I just decided blogging is not my cup of tea and quit it.